Update 19.02.26: Added Piper docker config running together with Whisper with GPU acceleration. See instructions below. Next step is to add voice clone (currently processing)
Introduction
I’m a big supporter of open source community, data privacy and ownership.
At the same time I have been curious of the possibilities of local LLM (Large Language Model) other than being just a buzz word and something everyone want without a real use case.
For my part I have been interested in finally having a solution where I can ask everyday questions and control our home when I have my hands full (kids’n stuff).
The challenge have been to find:
A) A local LLM model that can reliable control our home through tools
B) Have support for Norwegian language
C) A STT model (Speech to Text) that have good support for Norwegian
D) And finally good resource management with appropriate hardware for the task
Previous I have tried everything from Alexa, Siri and Rhasspy (local and the foundation for Home Assistant Voice)
So the benchmark is to have a solution that combines those 3, with good speech recognition, fast activation of commands and total local control.
So over to the good stuff with a little disclaimer; this is a combination of a lot of research and put together with my (limited) understanding of LLM and voice recognition.
If you find any improvement please let me know.
At the moment this solution is a Proof of Concept, but will be implemented fully in our home if it survives WAF (Wife Acceptance Factor), the ultimate business benchmark.
The solution should easily adapt to other languages with the use of other models through Hugging Face or Ollama.
Evaluation and Proof of Concept:
Answer to questions:
A) I have gone through roughly 20 different LLMs, before accepting that the best LLM with tools I could find is the Chinese Qwen model. At the time of the writing I’m using Qwen3:14b-instruct (14b – 14.8 billion parameters; instruct – a precise fine tuned LLM). Qwen is precise, fast without to much hallucination and actually working tools. The only other modell I have found working with tools is the ChatGPT model gpt-oss:20b.
Links:
Qwen3:14b
gpt-oss-20b
B) Happily I found out the Qwen3 model supports over 119 languages and dialects among Norwegian. Yey!
C) The standard models for processing in Whisper is no good with the Norwegian language. Luckly Nasjonalbiblioteket have made their own language model trained on Norwegian. Another yey!
Links:
nb-whisper
D) I have an existing virtual environment (VMware) for running relative demanding tasks as long there is no need for machine acceleration.
As a early Proof of Concept I have been using Home Assistant appliance running as a virtual machine with 2 vCPU and 24 GB of memory.
With this I have been able to run the Qwen3:14b with okeyish latency (10-15 seconds ish).
Unfortunately it doesn’t cut it when where is a need for low latency and demanding processing (LLM/ML etc) and future WAF branding.
Therefore I looked into the alternatives hardware wise.
Raspberry Pi 5 with Ai HAT:
The early possibilities was to run the LLM on Raspberry Pi with a AI HAT.
Unfortunately RAM wise it’s on the lower end with only 8 GB that is to little when running more detailed LLM models (mind future proofing).
Since I did not have any Raspberry Pi 5 lying around the total cost would be around 3 000 NOK.
Link:
Raspberry Pi Hat ver. 2.0
Orange Pi 5:
Next out was the Orange Pi 5. A powerful alternative to the Raspberry Pi with a total of 16 GB RAM and a powerful NPU with a capacity of 6 TOPS.
Unfortunately since it’s shared memory OS and other tasks eats of the total of memory.
The cost is around 2500 – 3000 NOK.
Link:
Orange Pi 5 16 GB ver
Nvidia graphics card:
I already had an old machine with a Geforce GTX 980 GPU with 4 GB VRAM.
Unfortunately memory wise it does not cut it with newer, more complex models.
If it had been a GTX 1080 TI with 11 GB VRAM it would have been acceptable or even better a 3060 with 12 GB VRAM (many still uses this old powerhouse).
Therefore I had to look into the most cost effective GPU with enough memory to run larger models (eg 16 GB VRAM).
The Geforce RTX 5060 TI with 16 Gb VRAM was the best choice with 759 TOPS and relative low power consumption (needs only 8 pin Power supply connection)
Next over to the voice satellite.
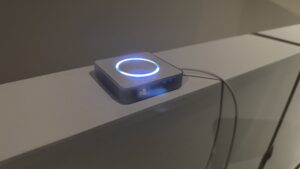
Ai ball:

I have for some time been using the Ai ball – a little ESP32 device able to run custom ESPHome firmware and use local wakeword.
It’s small and relative cheap, but the microphone is lacking (need to be close to it for a good experience)
Links:
Github page Ai ball
Ali express page Ai ball
Voice PE:
As I previous stated I’m a big supporter of Open Source community.
Nabu Casa – the company behind Home Assistant have created a voice satellite named the Voice Preview Edition.
It’s comparable to the Ai ball, but with better microphone and audio processing.
Featuring an XMOS XU316 with following functionality:
Echo cancellation
Stationary noise removal
Auto gain control
Dedicated I2S lines for audio in and out
It’s microphone is way more sensitive, while the speaker is mediocre.
It’s not perfect but at the moment I have not found any better package (quality vs cost) and speaker wise I’m planning to use existing solution with Sonos notification.
The cost is around 700 NOK and at the same time supporting the fantastic work of the Home Assistant crew.
Finally the actual setup and configuration and possible TLDR with introduction and evaluation/PoC.
Setup and configuration of LLM solution:
The dedicated LLM solution is running on a Ubuntu Server 24.04, with 32 GB RAM, 1 TB M2 SSD and RTX 5060 TI with 16 GB VRAM.
Ubuntu Server is installed with Nvidia latest non-free drivers (for optimal performance).
The LLM has been configured with Ollama in combination with Open Web UI allowing easier administration of Ollama server and better authentication mechanism should I decide on a later stage to make the LLM accessible through the internet with strong enough security for personal use.
Ollama and Web UI is running with docker compose with following configuration in a docker-compose.yml file.
Adapt for your local environment.
services:
  ollama:
    image: ollama/ollama
    container_name: ollama
    environment:
      - TZ=Europe/Oslo
    tty: true
    ports:
      - "11434:11434"
    volumes:
      - ./data/ollama:/root/.ollama
    restart: unless-stopped
    deploy:
      resources:
        reservations:
          devices:
            - driver: nvidia
              capabilities: ["gpu"]
              count: all
    # For older versions of Docker, you might need to use the environment method
    # environment:
    #   - NVIDIA_VISIBLE_DEVICES=all
  open-webui:
    image: ghcr.io/open-webui/open-webui:main
    container_name: open-webui
    environment:
      - TZ=Europe/Oslo
    tty: true
    ports:
      - "8080:8080"
    extra_hosts:
      - "host.docker.internal:host-gateway"
    volumes:
      - ./data/open-webui:/app/backend/data
    restart: unless-stopped
volumes:
  open-webui:
After starting the environment with “docker compose up -d”; you can access Ollama through Open Web UI on your hosts local IP and port 8080.
When you first access you need to create an account for further use.
Afterwards you can download the LLM model you may want from either Ollama or Hugging Face page (repositories for downloading a huge library of LLM models).
Links:
Ollama models
Hugging face models – for my part thinking of Aliens 😀
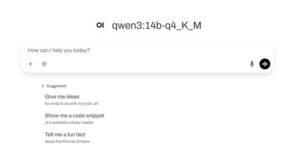
In this setup as I earlier have mentioned I’m using the qwen3:14b-q4_K_M model.
Go to User icon (right corner) -> Admin panel -> Settings -> Models -> Download button (right corner)

Here you enter “qwen3:14b” into the “Pull a model from Ollama.com” box.
After the download you can edit the default settings for the model by choosing the pencil.
The most important change is to edit “Advanced Params” where default setting on “num_gpu” is changed to “256”.
The setting describes how many gpu layers that can be used for the model – a lower number may be used but of my little understanding a higher number should not hurt performance, while not changing this setting results in only CPU utilization and no GPU acceleration.
After that you can start using the Open Web UI as a local alternative to ChatGPT/CoPilot.
Next step is to integrate Ollama with Home Assistant through the integration Ollama.
Add Ollama through Integration page by searching for Ollama.
Input the URL – IP and port eg: “http://10.10.20.100:11434”.
After adding the Ollama Integration you can add the “conversation agent”.
Select “qwen3:14b-q4_K_M (downloaded)” model.
In the “Instructions” box you instruct how the LLM should behave.
I’m using the following in Norwegian:
Du er en stemmeassistent for Home Assistant. Jeg vil be deg om å slå lys av og på, endre farge og lysstyrke på lys, heve og senke persienner, stille inn timere, slå TV-en av og på. Du vil alltid utføre den forespurte handlingen. Når du har identifisert riktig enhet og riktig hensikt, utfør den tilsvarende handlingen. Utfør alltid den forespurte kommandoen, selv om forespørselen nettopp ble fremsatt. Svar på spørsmål om verden ærlig. Svar i ren tekst. Hold det enkelt og konsist. Svar med et kort svar hvis du ikke forstår. Utfør alltid kommandoer uten å forklare hva du gjorde.
Select the box “Control Home Assistant” if you would like to control entities.
If you choose to select the “Control Home Assistant” it’s advisable to increase the Context windows size.
For my environment I have found with 94 entities exposed to Assist that it’s stable with 24576.
For other environments it may be less or more, so try it out and start in the heigher range and decrease until the response get unstable.
For the rest of the settings they can stay at default.
Congratulation; you have now integrated an external LLM.
You can test that it works through the Ollama Conversation assist entity in Norwegian.
The next step is to add Whisper docker compose to the mix to increase both quality and speed in processing of Speech to Text.
Speech to Text – Whisper:
See the following docker-compose.yml file.
services:
  whisper:
    image: lscr.io/linuxserver/faster-whisper:gpu
    container_name: whisper
    environment:
      - PUID=1000
      - PGID=1000
      - TZ=Europe/Oslo
      - WHISPER_MODEL=medium-int8
#      - WHISPER_MODEL=NbAiLab/nb-whisper-base
      - WHISPER_BEAM=3 #optional
      - WHISPER_LANG=en
#      - WHISPER_LANG=no #optional
    tty: true
    volumes:
      - ./data/whisper:/config
    ports:
      - "10300:10300"
    restart: unless-stopped
    deploy:
      resources:
        reservations:
          devices:
            - driver: nvidia
              capabilities: ["gpu"]
              count: all
First time the docker is started through “docker compose up -d” you are starting with the Norwegian version commented out.
After startup you can check successful startup through the command “docker compose ps” or “docker compose logs”.
Afterwards you comment out “- WHISPER_MODEL=medium-int8” and “- WHISPER_LANG=en”, while removing the existing comment for the Norwegian models.
The models are then downloaded; please check correct startup with the previous docker commands.
You can choose a different model (tiny, base, small or bigger models, as always the bigger the more memory it demands; please see National Bibliotekets page on Hugging Face:
Link:
Different Norwegian Whisper models
Next step is to integrate Whisper to Home Assistant.
Go to the integration page and search for Wyoming Protocol (you may have it from before, then go to the existing integration).
Add the host IP and port (eg 10300).
You should now have a new entity “faster-whisper”.
Text to Speech – Piper:
The last item is to add “Text-to-speech”; either by using an existing Piper integration and App (previous Addon) or install this by going to the Apps page and add Piper App.
Then select “Configuration” and choose no-talesyntese-medium under “Voice”.
For the Norwegian language I have found that with this voice sounds better with “Length scale” set to “1.5” (reducing the speed of talking).
Afterwards start up the Piper Addon after selecting “Start on boot” and “Watchdog”.
This solution however could have been a part of the dedicated GPU accelerated docker compose setup.
This will be updated on a later stage.
Update:
Added Piper running together with Whisper with GPU acceleration.
See the following docker-compose.yml file.
services:
  whisper:
    image: lscr.io/linuxserver/faster-whisper:gpu
    container_name: whisper
    environment:
      - PUID=1000
      - PGID=1000
      - TZ=Europe/Oslo
#      - WHISPER_MODEL=medium-int8
      - WHISPER_MODEL=NbAiLab/nb-whisper-base
      - WHISPER_BEAM=3 #optional
#      - WHISPER_LANG=en
      - WHISPER_LANG=no #optional
    logging:
      driver: syslog
      options:
        syslog-address: "udp://10.10.10.100:1514"
    tty: true
    volumes:
      - ./whisper-data/whisper:/config #beware of your path could be different
    ports:
      - "10300:10300"
    restart: unless-stopped
    deploy:
      resources:
        reservations:
          devices:
            - driver: nvidia
              capabilities: ["gpu"]
              count: all
  piper:
    image: rhasspy/wyoming-piper:latest
    container_name: piper
    restart: unless-stopped
    command: --voice no-talesyntese-medium  # Change to your preferred voice within HA GUI
    environment:
      - PIPER_RUNTIME=cuda  # Enables CUDA (GPU) runtime
    logging:
      driver: syslog
      options:
        syslog-address: "udp://10.10.10.100:1514"
    tty: true
    ports:
      - "10200:10200"  # Exposes API for HA TTS service
    volumes:
      - ./piper-data/piper:/data  # Stores voice models and cache
    deploy:
      resources:
        reservations:
          devices:
            - driver: nvidia
              capabilities: ["gpu"]
Voice Assistant:
You can now go back to “Settings” page in Home Assistant and select “Voice Assistant”.
You can create a new assistant by selecting “Add assistant”.
Give a name; eg Norwegian full local assistant and select Norwegian language.
Select the previous conversation agent; eg “Ollama conversation”.
Then under “Speech-to-text” you can select fast-whisper” and Norwegian language.
For the “Text-to-speech” section you choose “piper” as “Text-to-speech” engine; then no_NO under “Language” and finally talesyntese (medium) under “Voice”.
You have now configured every part for the working Norwegian full local assistant and can set it as preferred voice assistant.
You can now test it out through either your phone and the assist button in the upper right corner or through a voice satellite as Voice PE og Ai ball.
To allow Home Assistant control of named devices you must select to expose devices.
Then adding devices it is recommended to give them several aliases to identify them easily by voice.
Eg. ceiling lamp has aliases as Taklampe, Taklys og Lampe.
To further improve correct identification of entities the exposed entities should be added to Areas with an alias.
Then a voice satellite is a part of a specified room you can easily address the one device without specifying area/room.
This is a rather large write up; should there be any thing missed please let me know.
I have also previous been running the whole solution as part of the Home Assistant appliance.
If you would like description of how that can be done please let me know.
Hope you enjoyed, and if you would like more content like this please buy me a coffee through the “Support Me” button to the left.